Creating a Simple D.I.Y. Iron Man Arc Reactor
This is a guideline in creating your own do it yourself Iron Man Arc Reactor. This is not an exact duplicate., but it is something that you can construct with materials you already have or can easily get from a hardware or home supply store. *** Important: Please read part 10 at the very bottom of this article for some warnings before trying to build something like this. ***
It’s also designed to be worn under a shirt so you don’t need to be too neat when making the unit.
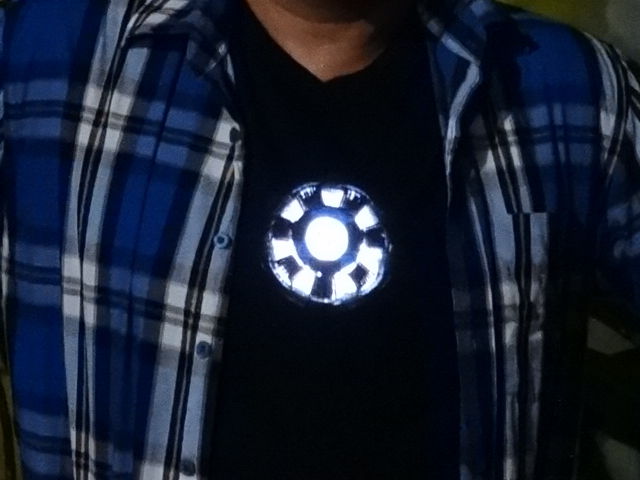 The final look of the arc reactor when worn under a black shirt.
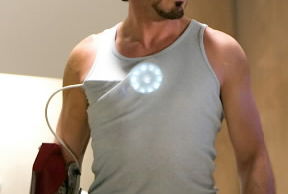
(Screenshots from the movie Iron Man produced by Marvel Studios)
The arc reactor mark 1 Tony Stark creates in the movie has the following features:
- An outer ring of light with 10 coils around it
- A central circle of light
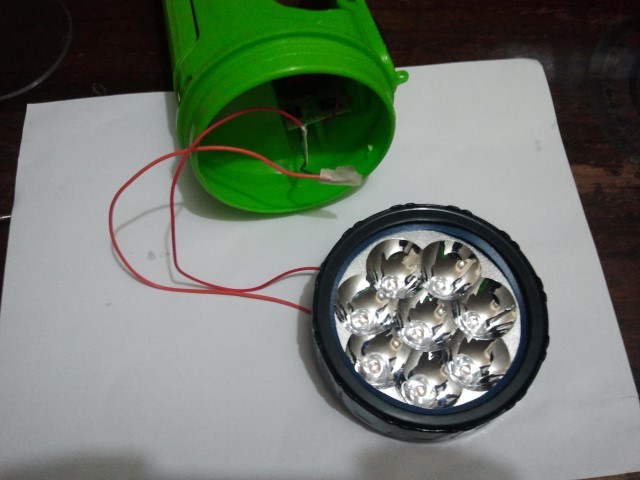 1. The Flash Light
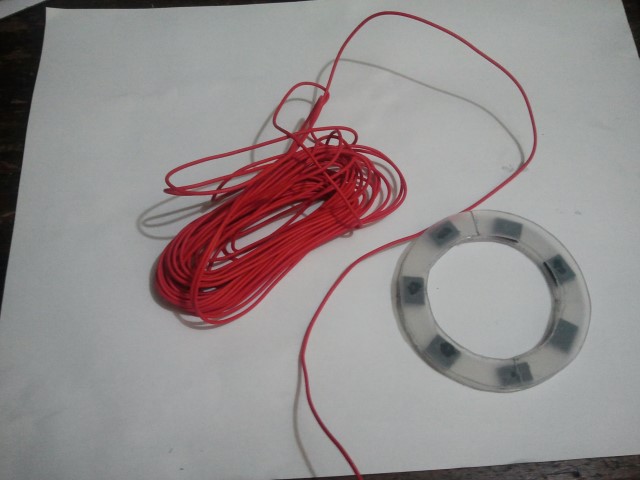
The Arc Reactor is based on a cheap LED flashlight. The reason we only have 7 coils instead of 10 is that this particular light only has 7 LEDs in its outer ring. We could have gone with the original 10 coil design but that left uneven illumination because the LEDs did not line up with the coils and the lighting looked uneven. If you could get a flashlight with 10 LEDs in it’s outer ring, then that would be better.
 2. The Light Ring
This is just made out of cutout plastic from some translucent plastic covers. You can use any type of translucent plastic for this.
 3. Creating the Ring
So we cut out 2 circles of plastic. They’re glued together with separators between them made from small black cardboard rectangles. The space isn’t that critical, we just want the coils to look a bit thick, although this really isn’t that noticeable under the shirt. Then we just use some red wire would and glued around the ring in 7 segments to align with the flashlight LEDs.
 4. The Central Light
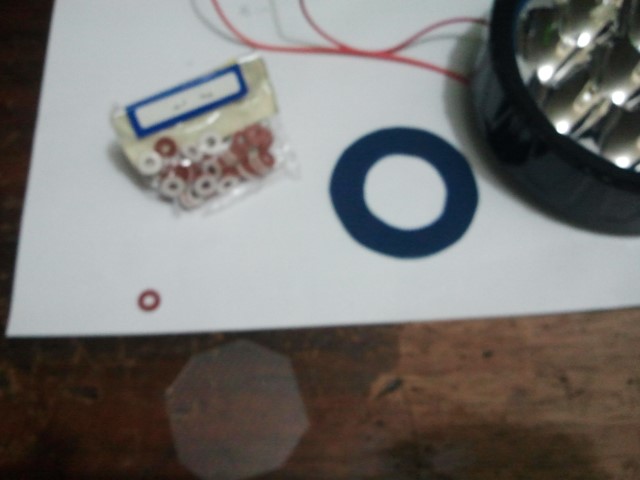
We cut a smaller piece of black plastic (or cardboard) for the black space between the inner light and the outer ring of light. We also cut a circular piece of transparent plastic to act as a cover for the central light.

5. Parts for assembly
In the above picture we see the flashlight LED module with the assenbled ring and coils and the central light cover. I just used some small washers and glued them to the central piece of transparent plastic just to give some detail to the central light.

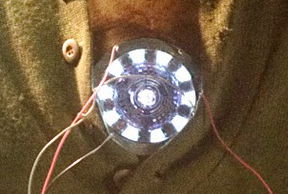
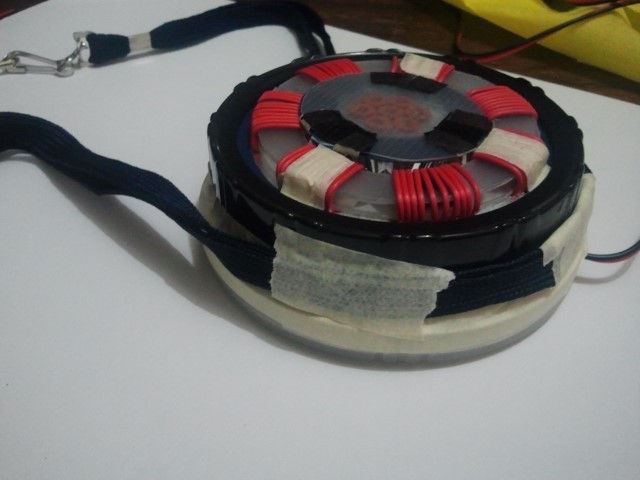
6. Initial Testing for the Arc Reactor
We glue and tape the parts according to the pictures above. It’s tarting to look like an Arc reactor now.

7. The Back Cover
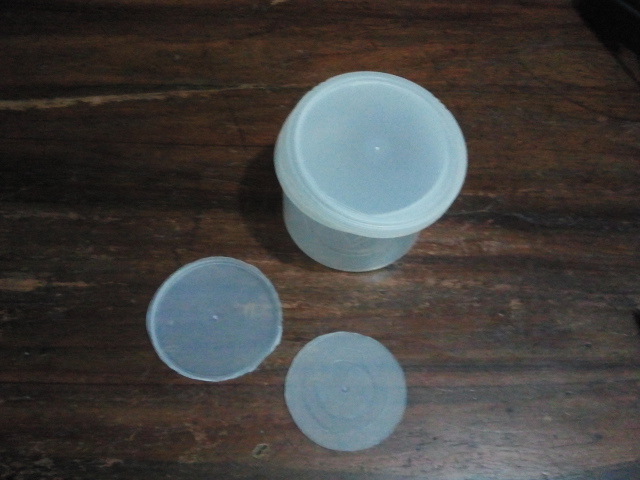
We’ll now cut the LED module away from the flashlight body and connect it to a long piece of wire to a battery pack. The back cover is just a circular cover from a plastic container that’s slightly larger than the flashlight LED module. We just tape it to the back. Don’t use cardboard for the back cover since it’ll be resting on your chest and sweat will warp cardboard.
 8. The Holder
The easiest way to wear this is to hang it around your neck like a large necklace. I just used a couple of ID holders. These come with clips for the IDs so when mounted this way it’s easy to unclasp from the back of your neck.
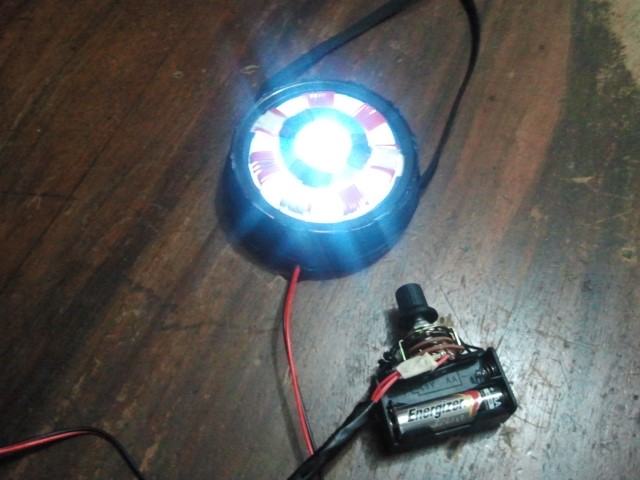
9. Attaching a Battery Pack and switch
Attach a 3 volt battery pack and switch to the unit so you can control it by keeping the battery pack in your pants pocket.
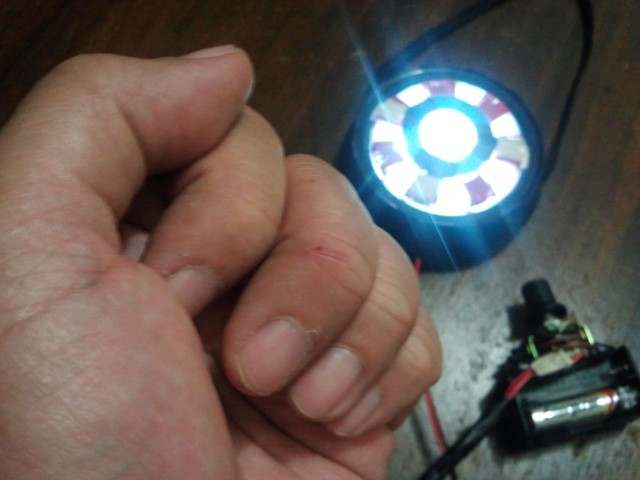
10. WARNING!
Please exercise caution if you do decide to build something like this. Building any type of electronic project has it’s own set of dangers and you are entirely responsible for the consequences of whatever you do. In the pic above I got a cut on my middle finger. I was trying to cut plastic and the sharp cutter slipped and nicked my finger. OUCH! It was bleeding a bit about an hour before this pic was taken. I’ve been doing electronics for years and these things still happen from time to time. ![]()

